AppV Howto Sequence
Contents
AppV Sequence HowTo
This is a quick guide to a 'perfect' sequence that just works fine first time.
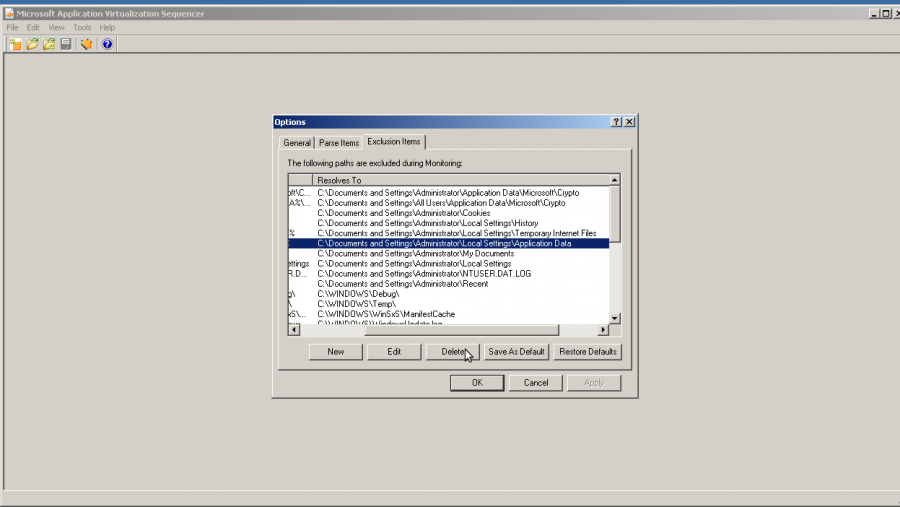
Fix Capture Exclusions
Apps often write data to c:\Documents and Settings\Local Settings\Application Data, but by default AppV doesn't capture this. This needs fixing.
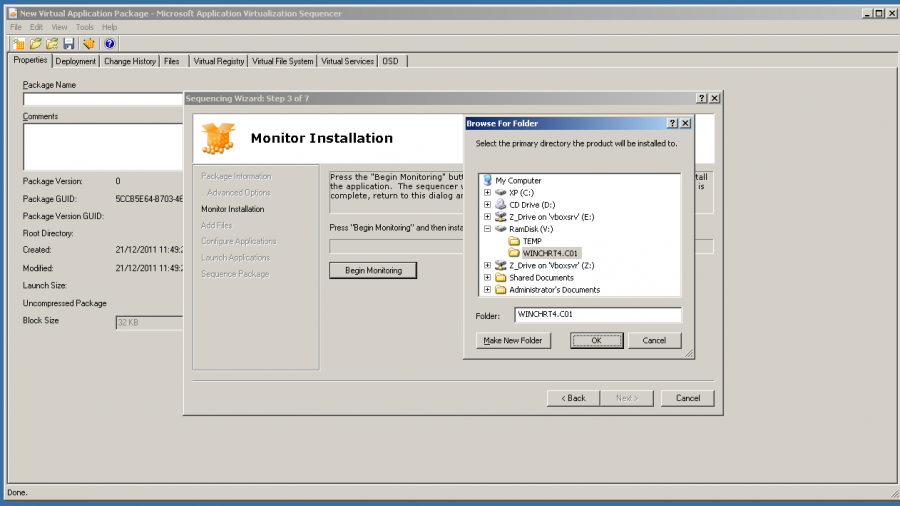
Create Capture Location
Create a 8.3 folder (XXXXXXXX.XXX) in CAPS on the V Ramdrive ('Make new Folder') , where the sequencer will monitor the installation (Primary Folder). It will monitor everywhere too.
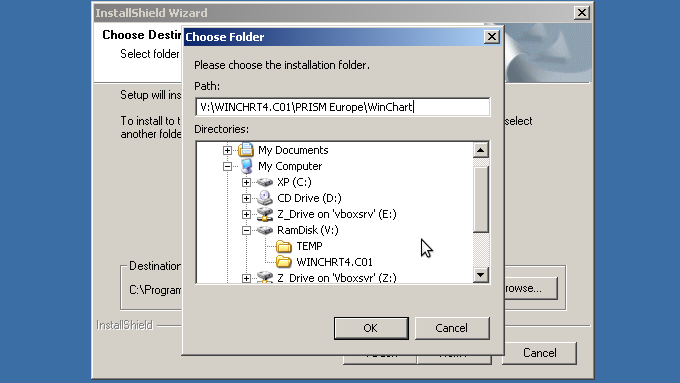
Application Install
Modify the programs installation directory to point to the V Ramdrive, usually easiest to just replace \Program Files\ with XXXXXXXX.XXX
Now launch the application from the desktop a few times, it may write files or registry keys which need capturing. N.B this can break things sometimes so launching isn't always best. Trial and error required.
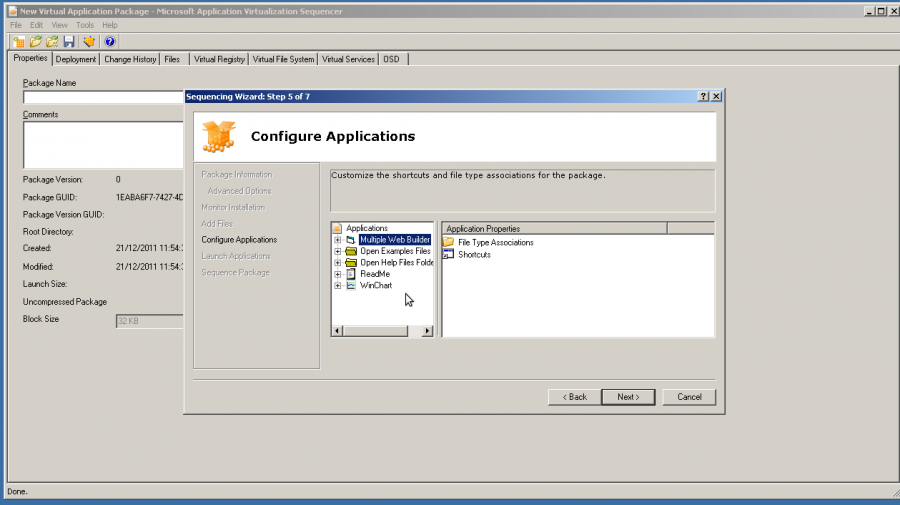
Delete shortcuts
After installation has finished skip Add Files, then you need to delete useless shortcuts, in this example just leaving the main 'Winchart'.
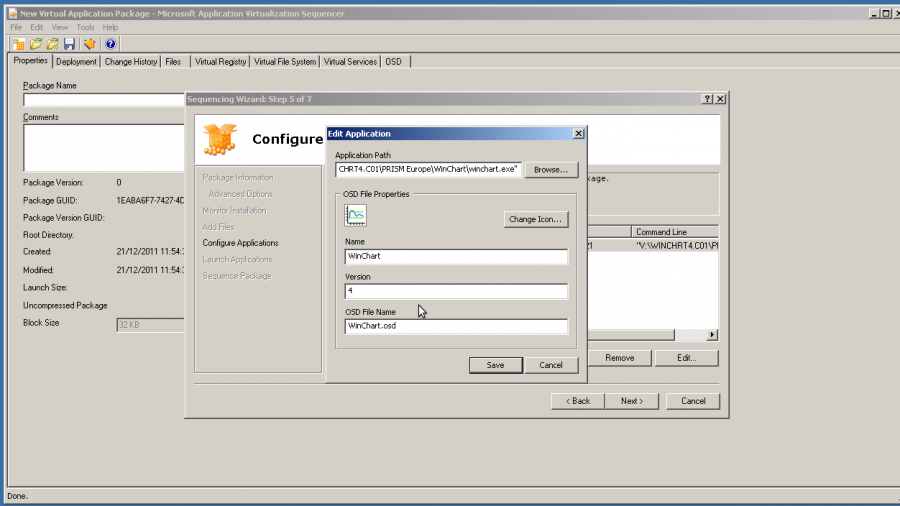
Fix Application Settings
This can all be left as is, but at the university it is tidied up. The 'Launching application' text displays a combination of what is set here in format 'Name Version'. So to tidy this up. Remove any trailing numbering from the name Change the version to a simple number (or create it from above) Shorten the OSD name to somehing sensible.
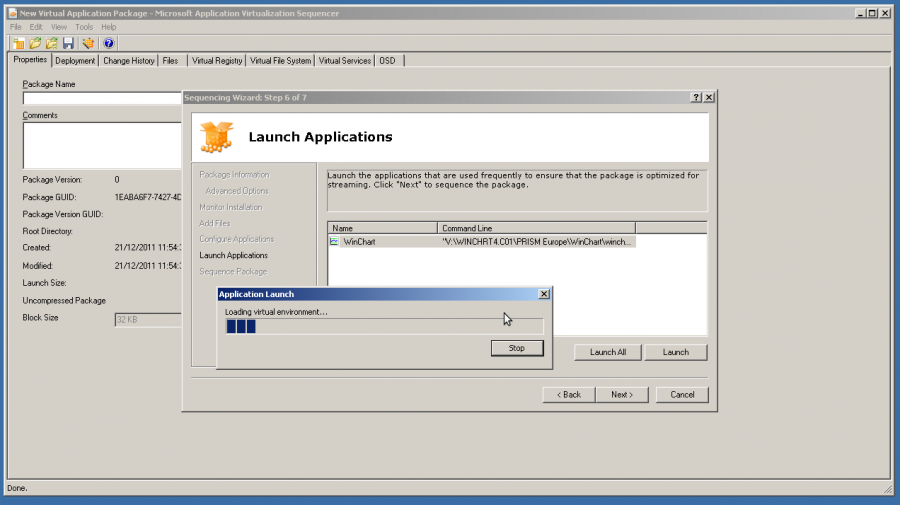
Launch App in sequencer
This creates 'feature block one' the idea being the final product will launch quickly with just the data captured here initially, then pull other bits off the server as needed. In reality this doesnt really do a lot in regards to speed.
Unlike the previous launch from the desktop that is purely running the locally installed version on (to V drive/path being only difference) this launches the application inside AppV's bubble AND it will have ability to read local files and registry from the installation. It is a hybrid of both. This is the only time this state exists.
N.B. The 'launch size' this creates in the end will be almost random.
Launch each application you have a shortcut too, this may again capture registry keys etc. missed on the installation. Other customisations can be made at this time to program settings etc as what happens here is still part of the final package.
N.B sometimes launching here will break the application, so it isn't always a good idea.
Final Settings
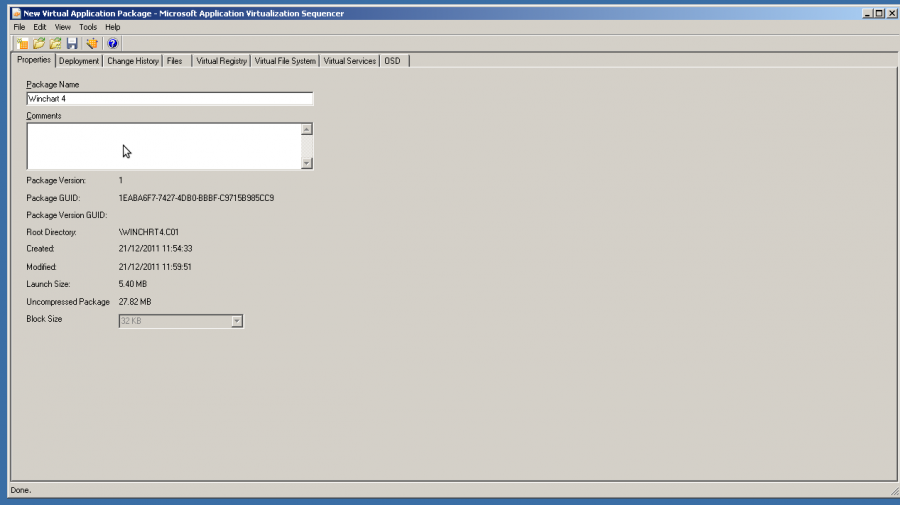
Properties tab
After finishing the sequencing wizard you can set the rest of the things up. 1) Change the package name to something sensible, this is just a way to refer to it and doesn't matter to what the end user sees.
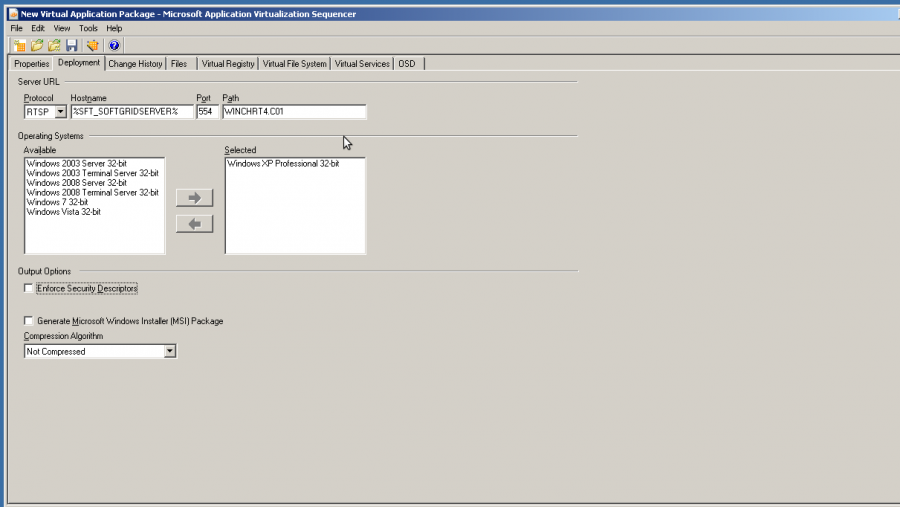
Deployment tab
- Change protocol to unencrypted RTSP
- Enter the Path which should be the same 8.3 filename you made on the V Ramdrive earlier. (XXXXXXXX.XXX). This is the initial path after the server root.
- Untick Enforce Security Desriptors
- Dont use 'compression' at uni, but it may well save a lot of space on apps with lots of fluff in them.
N.B. the 'launch size' is the 'feature block one' size which varies everytime you do anything with it if reopening it ! N.B. Uncompressed size is the overall size of the .sft package file
Files Registry Service
You can strip out unneeded files and registry keys, add keys, alter if keys/files merge or overwrite local copies etc. For a simple application and for this example leave all these as they are.
Save the project
- Create a folder in the root of where you are working with the same 8.3 filename used earlier (XXXXXXXX.XXX) e.g. \OSD\XXXXXXXX.XXX , where \OSD is the document root.
- Call the .sprj project file the same as the folder name but remove the '.' and suffix it .sprj e.g. \OSD\XXXXXXXX.XXX\XXXXXXXXXXX.sprj
